Showing posts with label technology tips. Show all posts

Friday, 5 March 2010

The Ingenuity of 10 yr Olds

Today, I learned of a 'do it yourself' invisible folder for your Mac. A Grade 5 student here from Sinarmas World Academy was working on his school laptop and I noticed that he had several invisible folders on his desktop. I asked him about them and he told me that he had made his own version of Camouflage which can be downloaded from Apple.com

Here's what the invisible folder looks like:


It looks like my desktop is empty. But actually I have an invisible folder there. You can click Tab to see it or swipe the mouse over.


See what I mean? Pretty cool huh!

To make this invisible folder, all you do it create a 3 X 3cm square in Photoshop or Pixelmator and make the background transparent by using the magic wand.


Then you export the file as a .gif and drop it into Img2icns software to create a folder out of it.


There you go .... your own invisible folder for secret documents.

Thanks to Riam Tambunan from Grade 5 for this cool technology tip.

Wednesday, 11 November 2009

Apple Remote Desktop Monitoring

Here at SWA we monitor all the Macbooks in the school using Apple Remote Desktop. It is truly a powerful tool that enables all teachers to see the student's screens whenever they need to. Our IT Tech Dept monitors every screen in the school. We use an Internet filter but Remote Desktop enables us to interact with students through chat, control the screen, view a whole class at once and lock the screen.

As a teacher I like to use it to guide the students in their work. I send messages about what they are doing to help guide the students more individually. You might argue that walking around the class has the same effect. For me Remote Desktop allows me to send my students off to work on a project in a quiet place away from the classroom. I don't have to worry that they will be off task as I can see their screen and know what they are up to.

On the technical side our on site technicians can help students with troubleshooting remotely. Just yesterday in Grade 3, one of the students was about to use iMovie to edit a documentary, only to discover that his laptop (from the laptop cart) had iMovie '08 instead of '09. I used iChat to contact our Tech Dept and they were able to install iMovie '09 remotely.


The photo shows the student waiting for the update with his screen locked via Remote Desktop so that he cannot press the wrong key during the installation. The problem was solved within 10 minutes.

Friday, 6 November 2009

Trying Out Apture

Today through reading online I learned about a tool for sites called Apture. It enables the user to enhance the site up adding links to other media. It is very easy to use.
I have now added it to this blog. You can see the site page here Apture.
I can even embed videos which can be very handy.

Hey, this is cool - link to Twitter. Just click the link to see the pop out.


You can see a demo of this here - video of Apture. Which I embedded via Apture.

Thursday, 29 October 2009

ICT Integration - Making it Easy


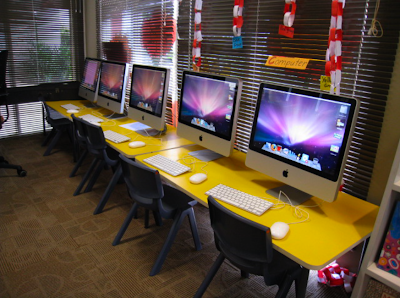
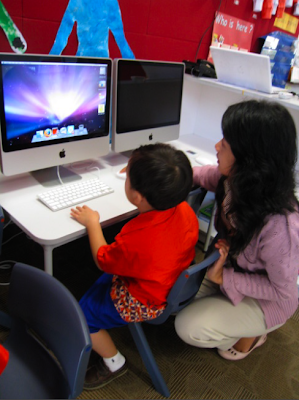
We have 5 lovely new iMacs in each of the Kindy classrooms. I wanted to set them up so that the students can use them independently as much as possible. Given that the users are as young as 3 years old I needed a strategy ...
First I changed the iMac settings for the desktop changing the icon size to the biggest one and increasing the text to 16pt.
Next I asked the Kindy teachers to send me links of sites or flash game files that they wanted to put on the computers. I also changed the dock so that only the most commonly used programs were shown there and I increased the size as well. A bigger size makes it an easier target for young users to click on.
Then I went into the requested sites and games and took a screen capture to be used as the icon for the game. This screen capture was dropped into Img2icn to create an icon for the shortcut.
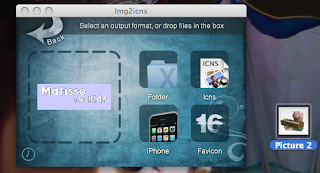


You can see the Img2icn in the picture above. Download it here IMG2ICN
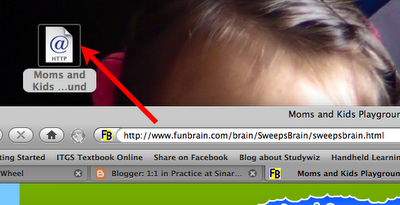

Next I dragged the link to the desktop to make a shortcut.
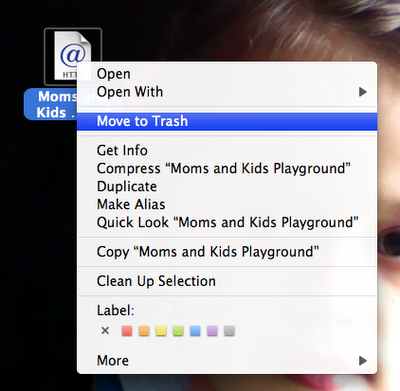

Then I right clicked on the new shortcut and selected "Get Info".
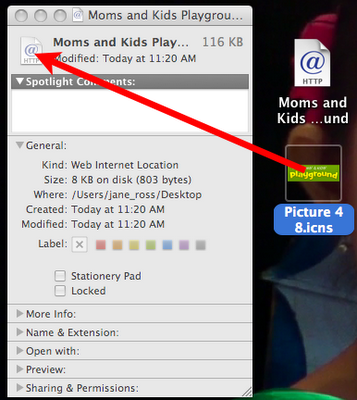

Next I took the newly created icon and dragged it onto the thumbnail until it changed the image.


Finally changed the name into something short and there you have it, a lovely shortcut ready for the desktop. Now all the students have to do is double click to go to that website. These shortcuts can be kept in a documents folder so that teachers can drag out only the sites to the desktop that they want their students to access for the lesson. It takes only a few seconds. This way the young students can use the iMacs much more independently.