Sunday, 27 March 2022

Learning is Inspired

Over the past 4 months I have been learning to work with wood. After moving to Australia, I quickly got a job teaching at OneSchool Global in Brisbane. I am now teaching Design Technology from Yr 3-11. It's a different experience to teaching overseas. 

After settling in during my first weeks, I soon realized that I needed to up skill myself in woodworking. The school has a wood working room, full of equipment that I hadn't used before. I did try completing a safety program online, but I soon realized that I needed to attend some classes in person to learn about how to construct with wood. In my previous school in Jakarta, I ran a Maker Space. The room had a lot of specialized equipment, but only hand tools for working with wood. I had access to a wonderful laser cutter - a Glowforge, but I still had too little experience in working with wood beyond plywood boards. 

In my second term of teaching, I was really excited to teach a unit all about up-cycling. This involved taking something old and renovating it to increase its value. I chose to work on a project of my own at school to gain a better understanding of the time, skills and equipment required. I had observed that my students really like PBL - Project Based Learning and having some choice around what to make. I started with a chair and brought it into school to use a provocation. 

The chair did spark a little conversation but my students were not very interested in it. 

How could I get their interest? 

How could I show that I am a learner too?

How could I inspire students to develop the Maker's mindset?

My shipping had just arrived from Jakarta and with it was my 30 year old guitar. It was the perfect choice! My students are very musical and there are a lot of small music bands in the school. I chose to up-cycle this old Yamaha and along the way demonstrate the Design cycle and share my process as a learner. 

How could up-cycling a guitar teach me about working with wood? Through my research, I soon realized that I would have to remove the strings and tuners and completely sand back the whole guitar (except for the fretboard). I learned that I needed to understand about finishing the wood after painting on the waterlily so that it could be played as a guitar. 

Not only did I get to learn about guitars, but I also learned about my students and their skills. 

Along the way I would ask: 

'What should I do next?'

'How will I know what's right?'

'Where can I get help with this?'


Did I inspire learning? Yes 
Was it engaging for my students? Yes 
Did I learn from my students? Yes 
Did I make mistakes? Yes
Did I share my mistakes with my students? Yes 
Here are some photos of the student projects produced.


This is just the beginning. Through my research into guitar making, I found a Luthier (guitar maker) in Brisbane. Long story short, I went to visit that workshop on a weekend and decided to learn to make a guitar myself from wood. But, that's a whole other story and needs a post or two on it's own. 

"Learning is inspired"


Tuesday, 1 June 2021

School Yearbook - Reimagined and Published Online with Book Creator

This year, I was given the task to coordinate and produce the annual yearbook. Traditionally, the yearbook was coordinated by a group of teachers and the layouts were produced by an organisation outside of the school. The book itself was a traditional heavy hardbound paper format that featured school events and those formal galleries of student photos in passport-style format. Given that our learning this year has been online, it was a logical choice to create an online digital yearbook. 

I chose to use online Book Creator as this app is widely used by our students, can be accessed via any device and importantly can accomodate a wide range of multimedia. I also really wanted to make this yearbook more environmentally friendly. There are cupboards full of old yearbooks at school which will probably never be used. Using Book Creator online had meant that our whole school community has easy access to the book and all those school event highlight videos could be included directly in the book. 

My process began by pitching layout ideas first to our school management and then later to all teachers at a weekly staff meeting. The biggest challenge was finding enough good quality photos of students engaged in their learning. This was because we had been learning online this year due to the pandemic. Photos taken via Zoom were not clear enough we needed help from our parents to send in photos of learning in action. It was a mammoth task to make sure that every child from Early Years to our eldest grade level was well represented.

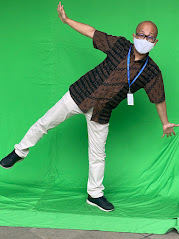
I was keen to break away from the traditional headshot passport photo galleries that were a feature of every yearbook in the past. I have always found them to be too formal and they don't capture the personality of the individual.  I started by creating a collection of ideas in which classes could be collaged together with fun themes for each grade level. Some examples of these were garden scapes, superheroes, a rainy day and 'What's your passion?'. As we had been transitioning into blended learning, I was able to photograph some students who attended school social pods using a green screen and the students who weren't able to come to campus sent in a head-to-toe photograph in front of a plain background. Each of these photos had the backgrounds removed so they could be layered together as a class.


We decided to keep masks on for these class photos to capture this unique school year. I used photoshop and the website www.remove.bg to remove the backgrounds and then layered the photos together in Canva which is an online app that allows editing layers of photos to create a digital collage.


Once the class layouts were made, it was easy to upload them to Book Creator. In Book Creator online, I added photos of online learning for each class and specialist subject area, special school events and even embedded videos. To make the yearbook more accessible, I included a Table of Contents to hyperlink to each section of the book and a back button on each page to allow a quick return to the Table of Contents. The finished book has over 215 pages and will soon be embedded on our school website. 


To cater to those individuals that really wanted a printed copy, I also made the PDF version available for printing on a photocopier. Here is a sneak peek at that hard copy version.  


Sunday, 11 October 2020

Oculus Quest First Steps

I have always been interested in VR and I've played around with Google Cardboard but I was not prepared with the huge difference that comes with a real VR headset. My school is investigating ways to use VR in teaching. I knew that I needed to get my own device so that I could really take the time needed to learn about VR.

It's always been my habit when using new tech, to find a way that is meaningful for me personally so that I can really see what the possibilities are. I soon learned from the free sample apps on Oculus that there is a whole world of VR fitness. I started to watch Youtube videos about different apps and decided to start with Beat Saber. 

The game took my interest straight away. You get two lightsabers to slash flying blocks in the direction of the arrows on them. The larger your movement, the higher the score will be. It's a rhythm game and it's great to move and slash in time with the music.  Watching Youtube I soon learned that there is a way to add songs via a program called BeastSaber. This online community hosts a huge collection of popular songs created by users for playing with Beat Saber. After a bit of working out (and watching a few tutorials) I learned how to set up my Developer account with Oculus, enable that mode on my Oculus app on my iPhone and then add songs via SideQuest and BMBF. The difference in gameplay was huge because now I could choose from hundreds of songs, and many already rated by the Beast Saber community. 

Now, I'm not saying here that fitness in VR is something that will be used at school but, who knows right? I see this as a way for me to learn how to use the Oculus and I might even improve my own fitness in the process. 

Soooo, I played about 14 games today in Beat Saber and it gave me enough exercise on my Apple watch to close the green exercise ring. What a plus! You might be reading this blog and wondering what's this got to do the education? Everything! I have always learned new tech by playing with it. Learning whilst in 'play mode' helps me to make connections that I might not get if I am too focussed on conquering the new tool. 

Here's a video of one YouTuber playing Beat Saber. Maybe I'll learn how to use the green screen to make my own video like this? Maybe I'll learn to make my own Beat Saber map? What's that? It's creating those flying blocks that go along with the song to be played in the app. So many new things to learn! You know, I am starting to make connections as to how VR could be used already. Can't wait to learn more ...


Sunday, 23 August 2020

Make a Jigsaw in Google Slides

I wanted to create an online puzzle activity for  Grade 5 now that everyone is learning from home. The problem with many sites is unwanted ads or that users often are required to sign up. I have been playing with the idea of collaborative puzzles so that students can work together whilst practicing using a trackpad. Using Google Slides makes it easy to share and control how many users are in each puzzle. There are no ads and I can check which students are working on what puzzle as their Google accounts will show me who is in which slide deck. And it's fun!

I thought that solving a jigsaw would give some practice in clicking and dragging the puzzle pieces whilst being careful not to resize them. I can also teach the students command-z which is undo on a Mac. 

How to make the Puzzle

Start by opening a new Slide doc from Google Drive and creating the image that you wish to use for the puzzle. It's a good idea to use a blank slide as the proportions match well with the puzzle website. 

Pro-Tip

In Google Slides you can easily search for images by clicking the photo icon from the menu bar and selecting 'Search the Web'. Be sure to use photos that are labeled for reuse. 


Once you have created your finished image - download that slide as a JPEG ready for uploading to the online jigsaw puzzle maker. 

Go to https://thejigsawpuzzles.com/ and create an account. It's free and it will save your project work. You can save up to 30 puzzles for free. Create a new puzzle and upload your JPEG. 

I prefer to leave my puzzles unchanged so that the pieces don't have to be rotated. This mode is easier for beginners and for students working in groups to solve the puzzle. 

When you want to create the pieces, mouse over the thumbnail of your puzzle to select what kind of cut and how many pieces you want. It's 100 pieces by default but I prefer 50 so it doesn't take too long to solve. Once the puzzle pieces have been generated, you will need to copy each one by one over to your Slides document. 
I like to use a split-screen on my Macbook so that I can copy-paste the pieces. You can't do them all at once as it will act as one image. You will need to copy them one by one. Do this by right-clicking each piece and choosing copy and then on your slides window click command-v. There are a couple of advantages to making the puzzle in Google Slides, no ads, no sign-ups, and students can work in small groups to solve the puzzle. Once you have all the pieces copied over, try making the puzzle to check if the size works. I didn't change the size which works well as it is smaller than the default slide. 

Once your puzzle is ready, all you need to do is share it with your class. You can even make copies so that you can have smaller groups working on the puzzles. It's a fun way to learn about controlling the trackpad which is such an important skill for students learning to use a MacBook. 

Monday, 17 August 2020

The Power of Publishing

Recently I ran two online workshops via Google Meet for the Emmanual Foundation's Innovative Schools Project.  The workshops were to help their graduates try to meet the needs of online learning now that all schools in Indonesia are closed due to the pandemic.

The first workshop was designed for teachers that are new to Google apps. I introduced Slides and led the participants through how to make a simple layout with layered photos in Slides. 

I wanted to keep things very simple so we stayed completely within the app and used the Google Image Search that is inside. I taught the participants how to add .png to a photo search to get vector images with transparent backgrounds. 

The task I set was to make a lesson that used photos and instructions. The participants were so keen that the workshop went on for 2 hours. 


For the follow-up workshop, I taught the participants to create a virtual reading room. Here is the example that I used Virtual Reading Room.
The example that I used with the group was in Indonesian. I published these stories almost 8 years ago. They were written as a part of the backpack project that I did back in 2012 in a small village in North Sumatra. I worked with the children in that village to write every day stories about their life. 

There was a lot of discussion about these books and I hope that I inspired these teachers to try publishing stories of their own. I used Book Creator to publish these books and they even have a free version that includes 40 books. 

I was so proud to see that these teachers (70 attended my session) were able to make their own reading rooms. Here's an example from the class. Here is a screenshot of a virtual reading room created by one of the participants. She even put links to each book and filtered the YouTube videos with SafeTube. I'm happy because I did go in detail about online safety and whilst YouTube has so many awesome videos, it's much safer to filter out unwanted content. 

Saturday, 25 July 2020

Kumparan National Children’s Online Festival

I want to share about an event that fellow ADE Hugo Indratno I did with media site Kumparan.com here in Indonesia. We had an amazing time creating a sharing about our JIS Elementary Personal Learning Program. It's a MakerEd program which is very PBL in nature and blends Apple technology with hands-on learning. Our message for this online event was all about how parents and schools can develop children's passions and creativity. The program ran via live streaming on YouTube (Festival Hari Anak Live - Hari Ketiga - YouTube ) for a couple of hours and included a making tutorial, tips for parents, and a live talk show all about fostering passions. It was so exciting to have President Jokowi and his wife introduce the event! 

Hugo and I worked with the Kumparan team to create the story behind the segments and the talking points for the talk show.  It was pretty cool to be able to share our teaching with such a huge audience. The video on YouTube has had over 24,500 views. 


Friday, 28 February 2020

IB Dunia at Global Jaya School

 Today I presented at IB Dunia. I share about Augmented Reality and how you make it. In my workshop taught about how to create interactive augmented reality on an iPad using Apple Reality Composer. It was a pack session and I took a suitcase of iPads from school for participants to use. We also explored Merge Cube together with Tinkercad as older iPads can use this. I wanted to make sure that I offered a number of options for schools with different types of iPads.


I also share about my new book Create Your Own AR Pet


Sunday, 29 December 2019

Personal Learning at JIS - Learning How to Learn

This is the second year that I have been running the big Makerspace (double classroom) at the JIS Elementary, PIE campus. I have been wanting to update this blog with my thoughts as to how the process is going. I am aiming to publish a more comprehensive guide on this by the end of this current academic year. Until that time, I am working with teachers to further develop the program. This is a work in process but I am starting the realise that it will always be in a constant stage of development.

In the past I have published a few books on particular projects that I have done with students. I have always waited until the finish to write the book. For this book however, I am realising that it may never be finished and that I need to move forward with it as it is.

The personal learning program at JIS has come a long way. Initially it was launched with help from a consultant on inquiry, Kath Murdoch. In the beginning, each homeroom teacher conducted the personal learning in their own classroom. Personal learning meant that each student pitched a proposal for a project idea and then spent the next 6 sessions to work on it. Each project was different. It was very hectic and the students mostly did research projects resulting in a slideshow or a document about what they had learned. There wasn't a lot of projects that involved hands-on making. I believe that this was mostly because managing so many different projects was too overwhelming for the homeroom teacher and there was a lack of resources and a lack of understanding of how to developing making skills.

I saw an opportunity to help. I love to make, it's what I do in my downtime. I am constantly teaching myself new skills and almost all of my teachers are virtual. I am constantly developing my own Maker Mindset. It's hard, it really is! I fail a lot. I get frustrated a lot. In my role I am continually learning from virtual teachers and in many cases learning on my own through trial and error. This is an important skill for students to develop.

I work with Apple devices either an iPad, a MacBook or my iPhone. It's my comfort zone. I use a range of apps to help me design and figure out my projects. I am constantly working between digital and analog. It helps me to see. I use the design cycle of Investigate, Design, Create and Evaluate. Using my devices allows me to work within each part of the design cycle.

Making with your hands is so much harder that just writing about it. It requires skills, knowledge and risk taking as a learner. The Maker Mindset is all about trying to make something even when you don't know if it will work. That's the hardest part.

I began with a simple idea. I wanted to share how I learn with students. Just that. I felt that I could be the bridge and support students and teachers to enable more hands on learning. I started to work with some classes. I did this by making my own learning more visible.
"You only know what you know and you don't know what you don't know."
I love to say this. Helping teachers and students to work outside of their comfort zone is how I help them to develop learning dispositions. We have four learning dispositions at JIS. They are, reflective, resourceful, resilient and relating. Helping students to develop the Maker Mindset creates opportunities to develop these dispositions. Using the Split Screen (what I am doing/what I am learning) to be mindful of learning really helps students.

Again - it's hard and requires a lot of energy. I have a lot to think about on this. Perhaps this post can be the start of it?

I think that this is a book waiting for me to write. I need input though. Shared learning is so much richer.

More later ...


This is a photo of a current project of mine. I leave my work out for students to see and to comment on so that they can see my process to learn from it. I particularly show my failures - 
this is one example of a failed project. 

Sunday, 22 December 2019

Online Book Creator App via iPad

I have been a huge fan of the Book Creator ever since it first began. My son John Tambunan was indeed the first child in the world to publish a book with the Book Creator app to the Apple iBooks Store. His book is called 'Little Fish'.

Imagine my excitement when Book Creator online become developed! To be able to use iPads (or MacBooks) to create online books which can be seen and edited by teachers on their own device is so powerful. I started using this app last year in the Makerspace. It is easy to use and has been a great way for students to document their learning in real time. I have hundreds of iTime journals to manage and this tool has made that process much more efficient. It is easy to see the books and you can see all of the ones that have already been published to Seesaw - by the little globe icon. Here is a screen shot of just some of the journals created this quarter.
After this New Year, I am planning to use a template. I have noticed that some of my students do a great job to document their learning but some struggle with including all the details. I have tried many strategies. First I tried using starter sentences on each table. Then I made a display with a checklist of what needs to be included. This did make an impact, but there are still gaps in many of my student books. iTime is such a busy hectic session so the documentation needs to run fairly independently.

I have been chatting with some of the homeroom teachers, and I am planning to try using a template with some of the classes. Here is that template.
 
I am hoping that this will help my students to better understand what needs to be included. I thought that including a key question for each session will also better direct their reflections. I have also created this display board with sentence starters to help reflections. This display features the JIS learning dispositions of Relating, Resourceful, Resilient and Reflective. 
I really need for student reflections to be more efficient so that it doesn't take away from the project time. Reflection is such an important part of the iTime process as this helps to make the learning more visible and give students an opportunity to make important connections in their learning.

Friday, 6 December 2019

Laser Cut Wooden Puppets with Keynote and Apple Pencil

We have a new Laser Cutter in the ES Makerspace. I have been wanting to extend working with wood for our students.

The first hurdle that I had to overcome was how to use the Laser Cutter. It's a Glowforge Pro. My first cut was documented on my IG account. I read as much information on the Glowforge site as I could. It was very easy to use as Glowforge supplies you with wood for your first project.

I wanted to start using the cutter as quickly as possible with my students. A Grade 1 class that I was teaching in the Makerspace provided me with that first opportunity. The students were interested in animals and learning more about the form of animals. For example: What makes an eagle look like an eagle? I asked each child to make a silhouette drawing of their animal.
It took a few attempts for the students to understand that they only needed to draw the outer shape. Next we looked into making some fo the parts move. I worked with each child to identify which body part could move by adding a split pin.

The students took a few attempts to draw their puppets which they did on paper . Next I photographed each one with my iPad inside the Keynote app so that I could trace over their drawing with an Apple Pencil to create a digital sketch.
I really like to use Keynote with an Apple Pencil for this and it is easy to export to PDF. PDF files are easily read by the Glowforge laser cutter. To send it to the Glowforge, I uploaded the PDF to the Glowforge online app and then added the settings for the cut.
As I was using local plywood (uncertified material), I needed to make some test cuts and watch carefully to make sure the wood is cut through safely.

I posted my progress to my Instagram account, which was liked and commented on by Glowforge. They even asked me if they could share my Grade 1 work on their official accounts which is very cool considering that this is my first try at using the laser cutter with students!


After successfully cutting out all the parts the students painted their puppets and put them together ready for the puppet show. We were the first class to use the new puppet theatre in our school library.